I think I speak for most chefs and line cooks when I say I hate cooking at other people’s houses. There are 37 knives and none of them are sharp, the spatulas are large, plastic and unwieldly, and in the gadget drawer, you see three different tools for peeling garlic and you can only assume there’s a fourth in there preventing the drawer from opening all the way. You ask the host for a basic metal sheet tray to roast mushrooms on and Sharon proudly returns with a deranged As-Seen-On-TV brownie dish designed to cook only edge pieces, and she’ll have the audacity to ask you, “will this work?”
As frustrating as these situations are, they make my life pretty easy come Christmas. Most people lack basic, quality essentials that professionals cannot live without. While these might not be the cutest or flashiest gifts on the market, they are very affordable, and their recipients end up using and truly loving them a lot.
While this guide is more about types of products rather than exact makes and models, I do suggest options for sourcing almost all of these gifts locally. Most of my recommendations can be found at either United Restaurant Supply in Raleigh or Whisk Carolina in Cary. United primarily sells to restaurants (but they are open to the public) and Whisk is a locally owned home kitchen supply store with a great selection and a friendly, knowledgeable staff.
1. Stainless Steel Mixing Bowl Set Vollrath Mixing Bowls, United Restaurant Supply, $39.52 for a seven-bowl set (sold a la carte) United (and most other restaurant supply stores) sell stainless steel bowls individually, ranging from less than a quart in size to 20 quarts. The biggest one I have is 13 quarts, and I think that’s about as big as any home cook will need. Buy the 13 quart and every smaller bowl they offer for a matching and affordable seven-piece set.
2. Instant Read Thermometer ThermoPop by ThermoWorks, Whisk Carolina, $34.99 Taking the temperature of meat is the only real way to check doneness throughout the cooking process, so no matter how good a cook is, it would be foolish to not have a quality thermometer around. Made by ThermoWorks—the undisputed kings of kitchen thermometers—this newer model delivers serious value in plenty of fun colors.
3. Fish Spatula Dexter Traditional Fish Turner, United Restaurant Supply, $24.98 Also known as a Peltex or offset-slotted spatula, this ubiquitous chef’s tool somehow eludes most home cooks. Nine times out of ten, when I’m looking to flip something in a skillet or on a griddle—whether it’s a big pancake or a delicate fish fillet—I’m reaching for this. If the person you’re buying for is a lefty, look online for a left-handed one.
4. Peppermill Unicorn Mills 9-inch Magnum Plus Pepper Mill, Amazon, $49.00 Perfect for anyone who likes the taste of pepper and doesn’t like twisting a piece of wood for 30 minutes. With every twist, the big stainless-steel burr-style grinding mechanism sprays fresh pepper like a 12 gauge. Many cheaper models have a ceramic or plastic apparatus which wears down over time; I have had a Unicorn for years, and it shows no sign of slowing.
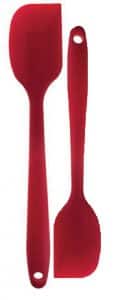
5. Small and Medium Silicone Spatulas OXO Small and Medium Silicone Spatulas, Whisk Carolina, $22.98 for both You’ll be surprised by how much you want to use these things. I reach for the larger one to stir food around in sauté pans or scrape out mixing bowls and the mini one for small saucepan jobs or getting soups and sauces out of the blender.
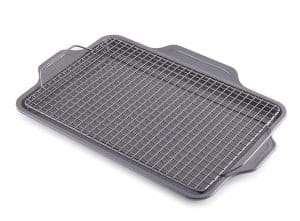
6. Commercial Grade Half Sheet Pan with Cooling Rack Set of four Thunder Group Half Sheet Trays and two Halco Wire Pan Grates, United Restaurant Supply, $35.56 Oven trays sold for home use are often overpriced or inconsistently-sized and flimsy, so I recommend buying them from the restaurant supply store. A stack of four sheet trays plus two fitting wire racks for cooling and elevated cooking make a convenient, compact set that will become the new go-to for oven tasks in any kitchen.
7. Carbon Steel Skillet De Buyer Mineral B 12-inch Fry Pan, Whisk Carolina, $89.99 Buy one of these and tell your hipster friend that nobody cares about his cast iron pan anymore. Like cast iron, carbon steel pans need to be seasoned and taken care of, so don’t buy this if you don’t think the receiver can handle the responsibility. Carbon steel carries some of cast iron’s heft, but it’s tempered with sleekness and maneuverability. For versatility, buy something with an 8-inch to 9½-inch cooking surface (the one I recommend has 9 ¼ inches). Avoid pans that aren’t smooth to the touch (like Lodge). If the model has flared sides like this, it should weigh no less than 4½ pounds.
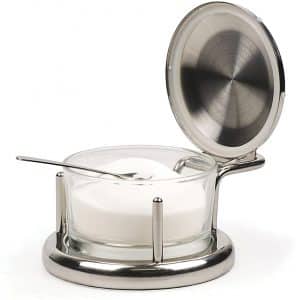
8. Salt Holder RSVP Endurance Salt Server with Spoon, Whisk Carolina, $29.99 While I’ve never seen one of these in a professional kitchen, Alton Brown uses one, and that’s good enough for me. If you really want to be like AB, buy a box of Diamond Crystal Kosher Salt while you’re at it.
Forty-six million turkeys die every year in the weeks leading up to Thanksgiving. I don’t have a problem with that; I’d be a hypocrite to say I did and then put one on my Thanksgiving table. My moral repulsion kicks in when I consider how many turkeys have to die twice—once in the slaughterhouse, and once during a prolonged stay in the oven of a cook who doesn’t care or doesn’t know better.
The Trouble with Tradition
Unless you nerd out on science-based food media like I do, you might lack some fundamental knowledge about the challenges of cooking a turkey—that’s not your fault.
As of 2006, USDA guidelines recommend cooking to 165 degrees on every part of the bird, including the stuffing. Much worse—in accordance with previous guidelines, many turkey companies still stick birds with pop-up thermometers that go off at 180-185 degrees. Unfortunately, these are both recipes for failure.
Farm-raised turkeys don’t fly much, so their breasts—designed to power the wings—don’t get much of a workout throughout their lifespans. As with the tenderloins of most four-legged creatures, turkey breasts are naturally tender and should be cooked just past the point where they’re no longer raw—150-155 degrees is ideal.
As ground dwelling birds, turkeys’ legs and thighs receive the bulk of their physical workload. The harder-working parts develop collagen, a tough muscle fiber that needs to be cooked longer to become tender. In the case of poultry, this workload is the difference between white meat and dark meat. Dark meat should be cooked to at least 165 degrees.
So how do we perfectly cook a bird to two different temperatures? For starters, we don’t stuff it. It doesn’t matter what’s in your stuffing; if it comes into contact with raw turkey, it needs to be cooked to be sterilized. By the time the very center of the stuffing reaches a safe temperature, the delicate white meat will inevitably be incinerated. I’m not saying we should skip the stuffing—I just recommend making it separately using turkey (or chicken) stock to emulate the flavor of stuffing the bird. If you want brown crispy bits and a more whimsical presentation, consider making your stuffing in mini muffin pans.
Brining works on a microscopic level to increase the meat’s water retention, which effectively limits the damage of overcooking—but only to a certain extent. If you want to maximize your turkey’s potential in both white and dark meat, you must alter its geometry to ensure the dark meat cooks faster than the white.
The New (and Improved) Normal
Fortunately, over the last few years, my Mount Rushmore of American food writers and recipe developers has come to a unanimous decision about the best way to cook a turkey in order to yield a juicier, better cooked, showstopper of a bird in less time and with less effort than traditional brining, stuffing and roasting.
If cooking up the juiciest, crispiest-skinned, most technically perfect Thanksgiving turkey possible interests you, follow the steps below. For more, check out J. Kenji López-Alt’s expertly researched and delightfully down-to-earth report in his Serious Eats column, The Food Lab.
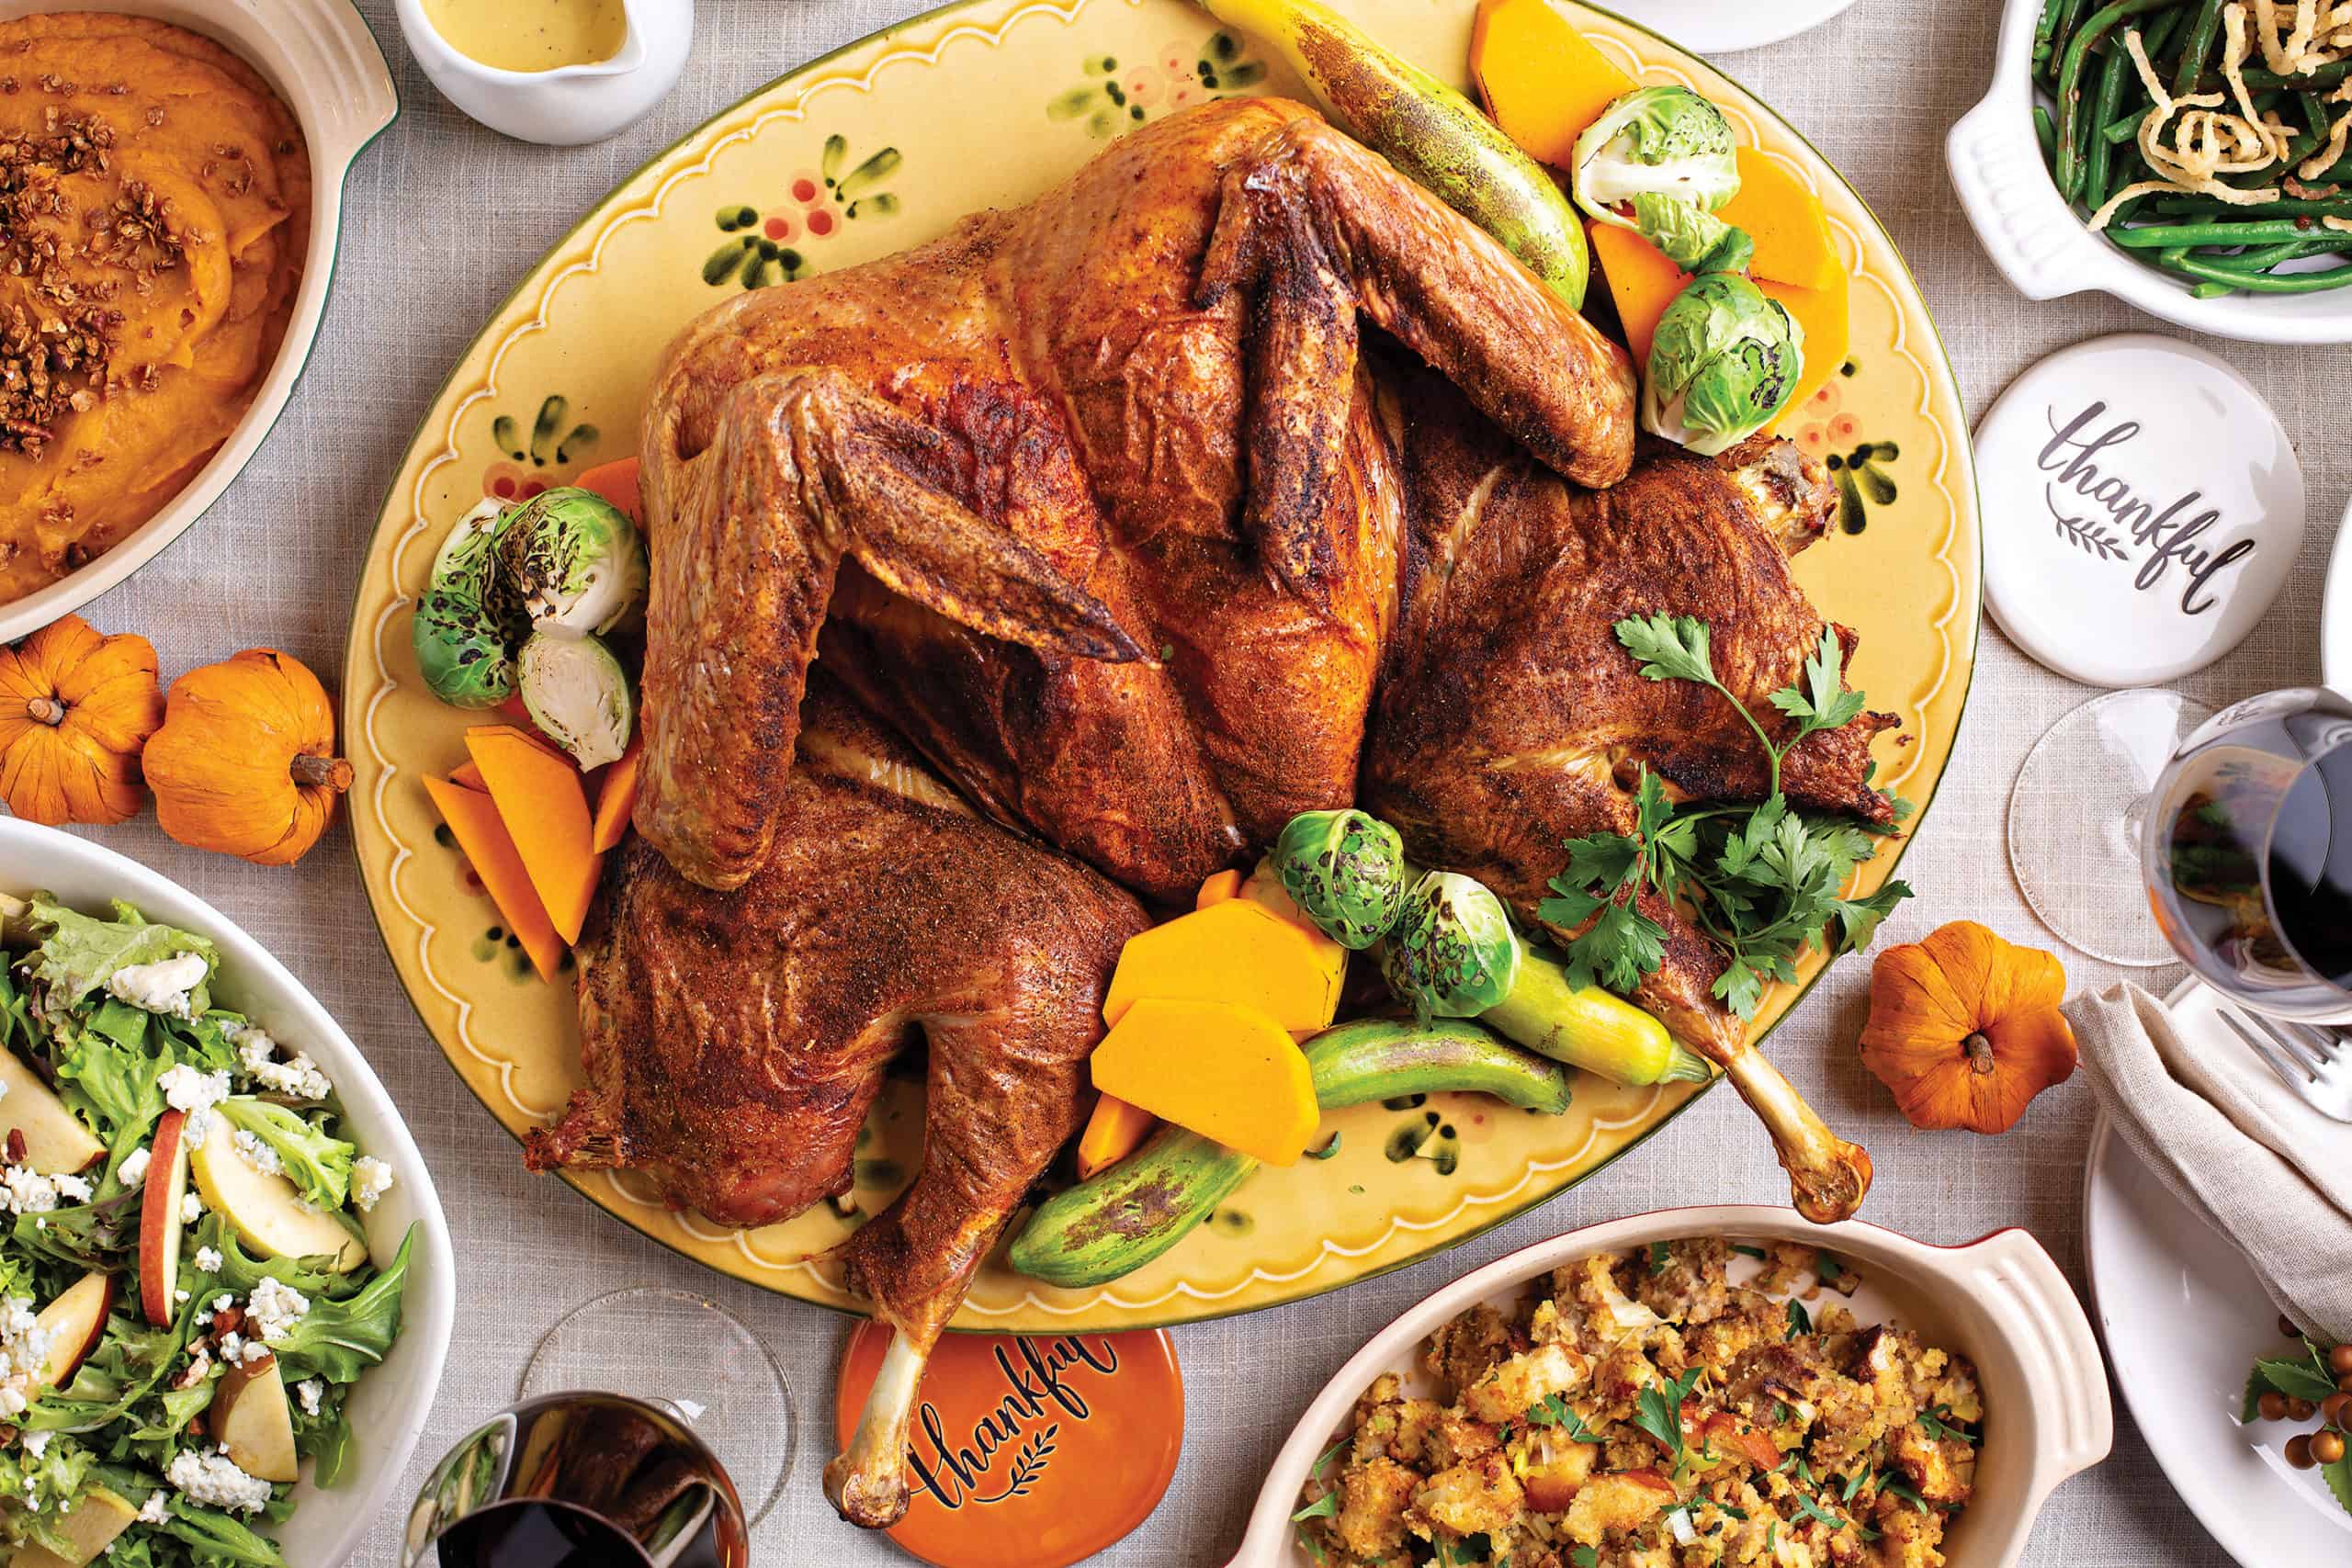
1. Spatchcock your bird. Spatchcocking is the poultry-specific term for butterflying: a process in which the backbone is cut out with poultry shears, flipped breast-side up and flattened out with a firm CPR-style push to the breast plate. A quick YouTube search of “spatchcocking a turkey” will render you an expert in minutes—and if the process seems a little too similar to the end of “Braveheart” for your comfort level, most butchers (like our friends at The Butcher’s Market) are more than happy to sell you a bird and spatchcock it for you.
Spatchcocking increases the surface area of the bird, especially near the legs and thighs, allowing it to cook more efficiently. Since the legs and thighs need to be cooked more than the breast, this geometrical adjustment is extremely advantageous.
2. Dry-brine your turkey the day before. Classically brining your turkey can be messy, and depending on the size of your bird, can take up a lot of space. Many of the pros recommend a process called dry brining. To dry-brine your spatchcocked turkey, liberally apply salt and spices to every part of the bird. Let it rest uncovered on a wire rack over a sheet tray overnight. If you can only find pre-brined turkeys (like Butterball or any bird that has salt in the ingredients list), skip the salt, but feel free to apply your favorite spices.
3. Use a hotter oven than usual,and pull the bird from the oven when the breast meat registers 150 degrees. For a 12-14 pound bird, turn your oven to 450 degrees. If you own a roasting thermometer that can stay in the meat while cooking, insert it into the deepest part of the breast, almost, but not quite, touching the bone. If you have an instant read thermometer, start checking the temperature about 75 minutes into cooking. Check every few minutes after that.
The downside to spatchcocking? You lose the aesthetic of bringing a brown, boulderous bird to the table, but I promise, what you lose in visual appeal is more than made up for in the palate. And you can rest easy knowing for certain that your turkey did not die in vain.
In this series, local chef Bobby McFarland offers tips on how to cook like the pros. Currently the lead culinary consultant at The Kitchen Raleigh, McFarland loves eating pomegranate, cheese and all things pork. His culinary hero is Alton Brown.
Along with homemade sourdough bread, charcuterie boards have dominated the food side of social media in 2020. Maybe it’s because they’re a great way to present and consume something delicious without actually having to cook, maybe it’s because they’re basically Lunchables for grown-ups and we’re all nostalgic for simpler times—regardless, I support the trend.
Charcuterie comes from the French words “chair,” meaning flesh, and “cuit,” meaning cooked. As Hannibal Lecter-esque as that sounds, the name harkens back to times before refrigeration when butchers had to process whatever cuts of meat couldn’t immediately be sold to extend their shelf-life and up their marketability. Today, these scrap-saving techniques of humble origin have heralded some of the most desirable foods on the market.
Just as “charcuterie” has broadened into an umbrella term for any deftly pre-processed or cured meat beyond the French catalog, “charcuterie boards” have grown to include things like nuts, olives, jams, fruits and, most importantly, cheese.
A Template for Successful Charcuterie Boards
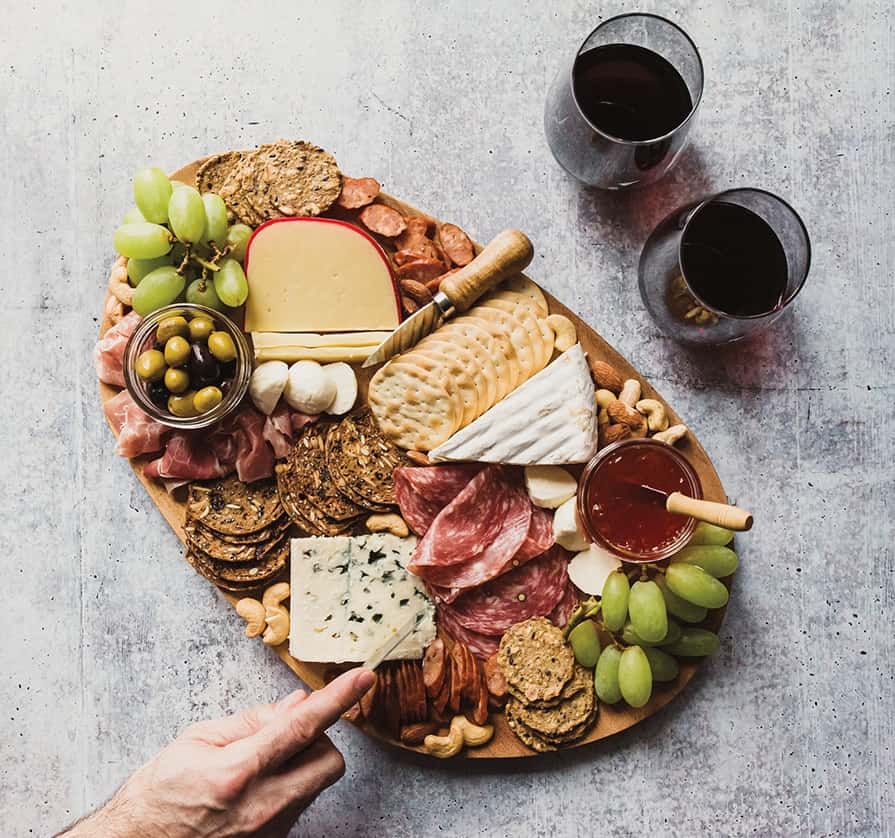
Perhaps another reason for charcuterie boards’ popularity is that they’re just as much an activity as they are an appetizer; you’re not just composing a dish, you’re curating an experience. As curator, you want to provide a thoughtful selection without overwhelming your guests, choosing components for visual, textural and flavor diversity while minimizing redundancy. We’re playing with savory, salty, tangy, earthy, spicy and smoky, so, when choosing your offerings, try to check as many of those boxes as you can.
I prefer a practical approach to plating charcuterie boards, pre-cutting anything hard or tedious for my guests’ convenience and placing like-colors apart from each other so the board appears as an edible mosaic—but if you’re the artistic type, feel free to get creative.
Finally, remember there’s a difference between lunch meat and charcuterie. Steer clear of pre-sliced pepperoni packets, cheese cubes from the dairy aisle or anything else that should only be consumed alone in front of the refrigerator.
Meats (choose two or three)
I put charcuterie into three categories: whole muscle, sausages/salami and paté/spreadables.
Whole muscle refers to any cut of meat left whole and cured: think prosciutto (a whole cured ham), coppa, or pork collar off the shoulder, also known as capicola, or bresaola (air-dried beef shoulder). Personally, I love speck (smoked prosciutto) and hot coppa, to bring an extra element of smoke or heat to the spread. Buy these thinly and freshly sliced from a deli, specialty store or supermarket that you trust.
There’s plenty of diversity in the sausages/salami category, so it’s fine to choose two if they’re discernible enough to the eye and palate. It’s perfectly acceptable to serve a coarsely ground dry-cured sausage, like sopressatta or Spanish chorizo, with mortadella because they look and taste so different—just consider pre-cutting the slices of mortadella so it can fold in half and fit nicely on a bread slice or cracker.
Patés and spreadable meat might sound unappealing, but I assure you, some are not as polarizing as chicken liver or foie gras mousse. I’ve been seeing more and more pork and duck rillettes—essentially fall-apart tender-cooked meat whipped into a savory spread—in grocery stores lately. N’duja is one of my all-time favorites: a spicy, tangy, fatty cured pork native to Calabria, aptly described as “spreadable salami.”
2. Cheeses (choose two or three)
As with meat, you’ll want to choose distinct cheeses. I like to mix up the textures: think a manchego, a brie and a spreadable chevre. A good rule of thumb is to stick mostly with crowd favorites but throw in something challenging that might surprise people (in a good way).
This might mean buying a gorgonzola dulce: a sweeter, creamier blue variety known to convert the formerly blue cheese-adverse. And while I personally love brie’s borderline offensively-pungent cousin, taleggio, I usually try to bridge the gap with a more mildly funky camembert or robiola.
Finally, don’t be afraid to try a cheese you’ve never had before—shop somewhere that has a cheesemonger or a knowledgeable staff and ask for guidance. More than once, I’ve spent a half hour talking cheese with Jeff at Wegmans and I always walk away with something new to try (often after a stop in the wine and beer section).
3. Bread/Crackers (choose one or two)
Sliced baguette or Italian bread, served fresh or toasted with olive oil, salt and pepper, is a must. Crackers are optional, but appreciated, as long as they don’t crumble or crack too easily.
4. Spreadable Accoutrements (choose one or two)
To not include jam, marmalade, or honey on a charcuterie board is a missed opportunity, especially if you’re serving sharp or funky cheese. Other options include caramelized onions, caramelized onion jam or whole fresh honeycomb (which can be a real showstopper).
On the savory side, whole grain mustard, olive tapenade and even salty cultured butter are welcome additions to most boards.
5. Stackable Accoutrements (choose one or two)
I consider anything that can pile on to a piece of bread with meat and cheese a stackable. Think what a roasted red pepper, a pre-cut marinated artichoke heart or a slice of fig can do to a bite with fresh mozzarella and prosciutto.
6. Snackable Accoutrements (choose one or two)
“Snackable” refers to olives, grapes, berries, nuts and cornichons that are more conducive to eating alone than with a bite of meat and cheese. Think of them as things to snack on while you contemplate your next real bite.
For some, ordering spicy food is an unnecessarily masculinized endeavor akin to buying an oversized truck, a flame-painted speedboat or wearing shorts and no jacket in the winter while pretending to friends it’s “not cold.” Others are so spice-adverse that you’d be shocked to find them eating anything other than vanilla ice cream or iceberg lettuce on Wonder Bread. But in this world of heat freaks and spice prudes, I implore you to live in the middle.
Even if you don’t like spicy food, there’s a good chance you unknowingly enjoy some foods with spice. There’s also a chance that the reason you enjoy these foods so much is because they contain a marginal amount of heat. Consider tacos, curry or your favorite foods from southeast Asia, which—even in their milder versions—use a variety of fresh and dried chili peppers. You can look even closer to home, at the chili flakes or hot sauce added to NC vinegar-based BBQ sauce, the pinch of cayenne in a pot of chili or the pepper grinder on your dinner table.
What is Heat?
Instead of getting picked up by our taste buds, the actively “hot” element in chili peppers—a substance called capsaicin—stimulates nerve endings on the tongue. This causes a warming or burning sensation, depending on how much capsaicin is used and what an individual’s tolerance level is. The more you eat spicy food—or the more your ancestors ate spicy food (yes, it’s genetic)—the higher the threshold where the pleasure of spicy food turns to pain.
The Case for Capsaicin
Many of our favorite foods—the aforementioned tacos, curries, Pad Thai—taste so confoundingly flavorful because they utilize more than just the five basic tastes (sweetness, sourness, saltiness, bitterness and umami). The best, most robust foods in the world also utilize heat, which stimulates more of the tongue, broadens and amplifies flavor, sends more signals to the brain and triggers more endorphins to scientifically increase the pleasure of eating. Even if you start small, taking this as a lesson into your own kitchen is one of the easiest ways to immediately up your culinary prowess.
Capsaicin isn’t the only spicy substance—black and white peppercorns contain piperine, mustard and radishes (especially horseradish and wasabi) contain allyl isothiocyanate, and raw garlic and onion contain allicin—all of which similarly trigger our nervous systems.
Other parts of your body have capsaicin receptors too, so if you’re handling hot peppers, be sure to wear gloves or wash your hands well before touching your face or going to the bathroom.
Embracing the Fire
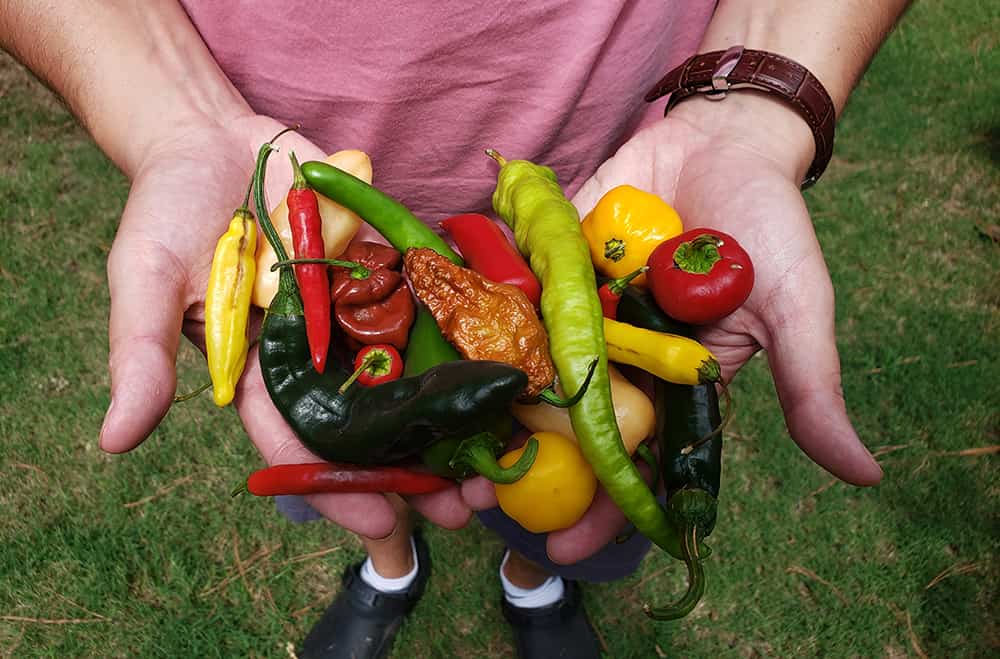
With the fear of capsaicin eliminated—or at least managed—the world of spicy ingredients can still seem overwhelming: cooks contend with fresh hot peppers like jalapeños and poblanos, chili pastes, powders, oils, about a million hot sauces—and that’s just at the local Food Lion. The semantics of it all can be downright confusing: chipotles are fully ripened, smoked jalapeños; anchos are fully ripened, dried poblanos, and if there are all these specific chili powders, then what the hell is regular old chili powder?
My answer? Don’t worry about it. Just don’t shy away from the recipes that call for hot peppers, and take note of what surprises you. Experiment with new, spicy ingredients when you’re cooking off-book. Over time, you’ll build a fiery arsenal catered to your preferences and experiences.
Calabrian Chili Mayo
The first time I tried Calabrian chili paste, I was a line cook under Chef Jeff Seizer (currently the chef/owner at Royale in downtown Raleigh) at a small Italian restaurant near Madison Square Garden (shout-out to Biricchino). I had never seen the ingredient before, and I had never tasted anything like it. Yes—the chili paste was spicy, but it was so robust and tangy, and the depth of the flavor lingered just as long as the heat did.
I was addicted—stirring it into pastas, soups and mixing it with butter and spreading it on bread. Eventually, I mixed it with mayonnaise and put it on a sandwich with salumi and fresh mozzarella, and then on just about every sandwich I made myself at work for the next two months.
When I moved to North Carolina, I found Calabrian chili paste at an Italian specialty shop in Morrisville called CapriFlavors (it has since moved to Cary), and I have kept it stocked in my fridge ever since. Over the last few years, the ingredient has seen a spike in popularity, mostly among chefs at Italian restaurants. Last week, however, I saw it on display at Trader Joe’s. It’s safe to say that this once-obscure culinary obsession of mine has hit the mainstream, and I couldn’t be happier to share this recipe.
Ingredients
1 cup mayo* (I prefer Duke’s) 1 Tbsp. (or more, if desired) Calabrian chili paste 1 medium clove of garlic, minced (optional) 2 basil leaves, chopped Fresh lemon juice (squeeze about 1/8th of a lemon) Salt to taste
*for a healthier option, use half mayo and half Greek yogurt
In this series, local chef Bobby McFarland offers tips on how to cook like the pros. Currently the lead culinary consultant at The Kitchen Raleigh, McFarland loves eating pomegranate, cheese and all things pork. His culinary hero is Alton Brown.
James Beard, for whom the prestigious culinary awards are named, once said, “If I had to narrow my choice of meats down to one for the rest of my life, I am quite certain that meat would be pork.”
This makes sense, considering the creature’s remarkable versatility: ham, pulled pork, baby back ribs, prosciutto, the ubiquitous pork belly restaurant appetizer, almost every type of sausage, and—let’s not forget—bacon. It’s understandable that among all of these popular porcine products, the humble pork chop is often forgotten. You might even say the others hog the spotlight (I’m sorry).
What Is a Pork Chop?
Every animal has tough cuts and tender cuts. Tough cuts, like brisket and pork butt, come from the hardest working parts of the animal, often near the legs. To accommodate their daily workload of supporting the animal as it tromps around, these muscles develop a lot of connective tissue (called collagen) around their normal muscle fibers. As a result, you should cook these tough cuts “low and slow” to gently melt the collagen and tenderize them.
Tender cuts—like chicken breast, expensive steaks, and pork chops—come from parts of the animal that don’t work very much. As a result, they don’t develop much collagen and are therefore tender by nature. That’s why steaks like ribeye and New York strip are so desirable—you can quickly cook them to a tender medium rare.
Pork chops share the exact same real estate on a pig that make up these high-dollar parts of the cow, but the popularity of the pig’s other parts—the hams, ribs, bacon—drives down the price of the chop. This leaves you—the consumer—with an excellent opportunity for value.
“But I Don’t Like Pork Chops”
The most common complaint about pork chops is that they’re too dry. I get that—my mom had to coat them in corn flakes and serve them with applesauce for me and my siblings to even consider touching them (love you, Mom). But pork chops are wet when they come out of the package, so if the chops are dry after you cook them, how is that the chops’ fault? Not liking pork chops for being dry is like not liking your car because you crashed it on your way home from the dealer.
Most of us only know dry pork chops because we only know overcooked pork chops, and that’s not our fault—or our mothers’. And it should please you to know that, like seemingly everything nowadays, you can blame the government.
Until 2011, the USDA recommended cooking pork to 160 degrees to prevent trichinosis, which has all but been eradicated in pork (most cases nowadays come from consuming wild game meats like bear and boar). So if you’re a millennial like me, every package of pork chops during your childhood came with a sticker from the government insisting they should be overcooked. Even if you’re Gordon Ramsay, 160 degrees gets you a dry pork chop.
If you cook them less and take a few other pointers, pork chops will quickly become one of your (and your family’s) favorite things to eat—I promise. And what better time than grilling season to give them a try?
Tips for Pork Chop Justice
1. Cook them less
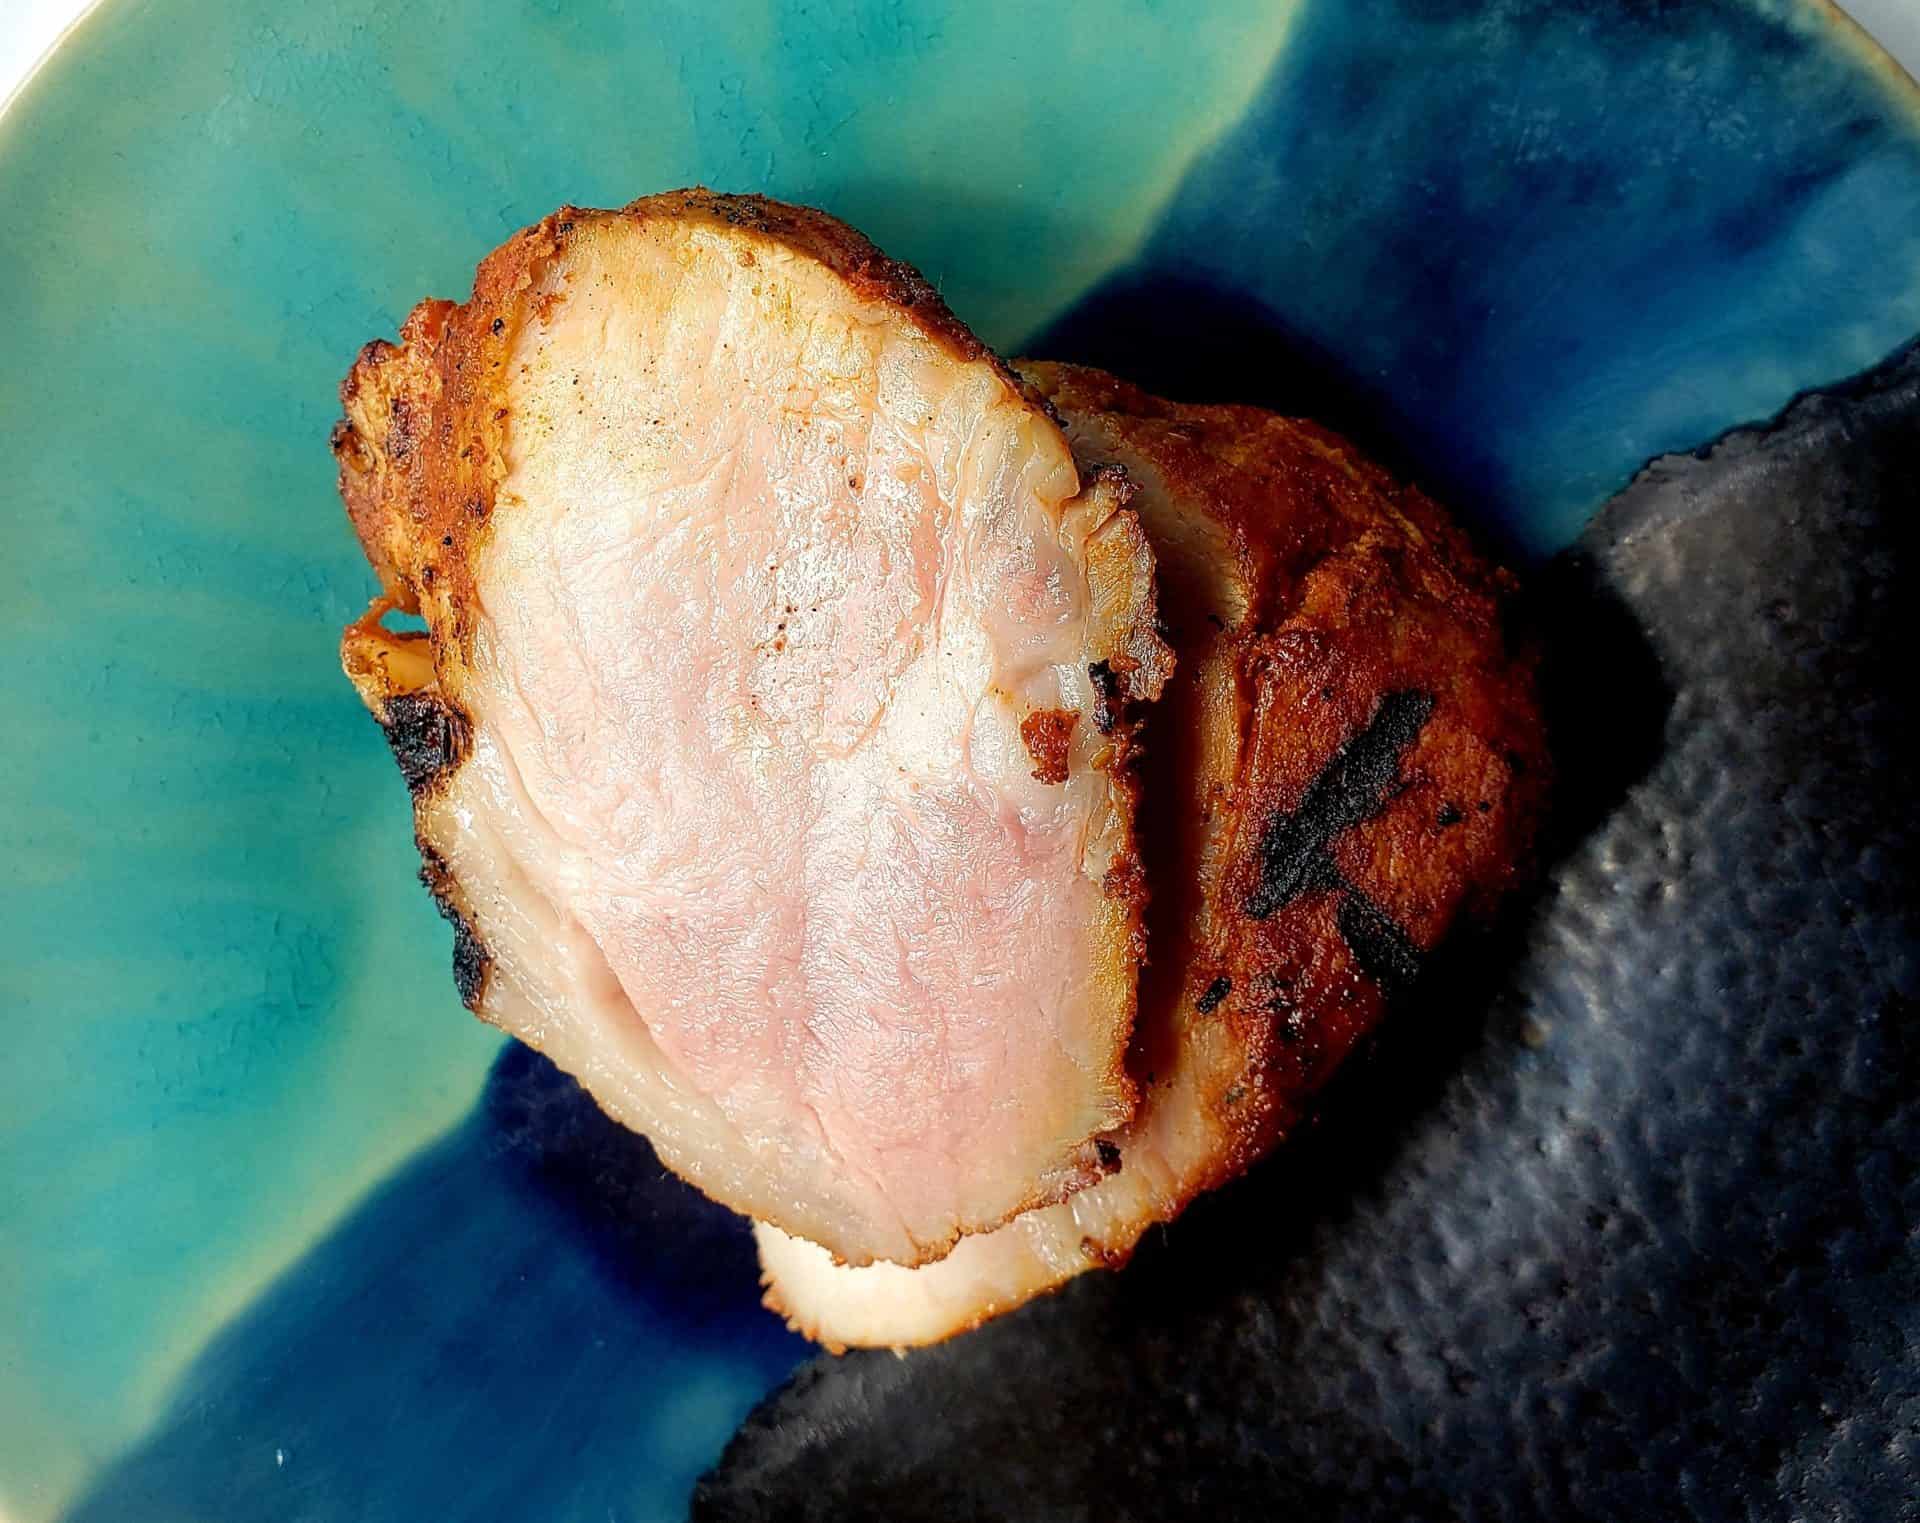
The USDA currently suggests cooking pork chops to an internal temperature of 145 degrees, which in more tangible terms is about medium. I know some chefs who prefer them medium rare, but I think the USDA-compliant 145 degrees yields the perfect moistness and chew in pork chops.
Invest in an instant read thermometer—I bought mine in the $20 to $30 range on Amazon and I use it all the time. It sticks to the fridge magnetically so I always have it handy.
2. Season them well
Pork chops are great flavor sponges, so feel free to use your favorite rub or seasoning blend (I’ll include my favorite rub at the end of this article). Whatever you put on your chop should taste very salty—remember, you’re using a lot of salt on the outside of the meat to compensate for the inside.
3. Season them early
I highly recommend seasoning your pork chops at least an hour and up to a few days ahead of time. Food nerds like me call this process of pre-applying a salty rub dry brining or curing. I won’t bore you with the science of how dry brines work (plenty of great info if you Google it), but take my word for it—salting sooner yields moister, more flavorful meat 100 percent of the time.
4. Crank up the heat
Get your grill (or pan, if cooking indoors) hot enough that it may concern those around you. Your objective is to get a nice sear on the outside of the meat before overcooking the inside, and it’s always easier to turn down the heat or flip the chop if it’s searing too fast than it is to heat the grill—so start hot, and adjust if necessary.
Chorizo Pork Chop Cure
Ever since I studied abroad in Spain, I have been obsessed with Spanish chorizo. It’s fatty, smoky, garlicky, robust, a tiny bit spicy—everything you want in a sausage. About ten years ago, in an effort to consume fewer calories, I took the seasonings that go inside my favorite chorizo recipe and liberally applied them to the outside of a pork chop before letting it sit in the fridge overnight. The result of this experiment is one of my proudest recipes.
I recommend smothering the pork chops on all sides before letting them sit for a few hours or up to a few days. This rub is versatile stuff, so save leftovers! It’s a favorite among my friends on roasted veggies or grilled okra.
3 Tbsp. kosher salt 2 Tbsp. sugar 3 Tbsp. smoked paprika* 1 Tbsp. chipotle powder 1 Tbsp. garlic powder 1 tsp. dried thyme, crumbled up between your fingers (or ¼ tsp ground thyme)
*It’s worth buying nice paprika. I prefer sweet smoked paprika from Spain.
In this series, local chef Bobby McFarland offers tips on how to cook like the pros. Currently the lead culinary consultant at The Kitchen Raleigh, McFarland loves eating pomegranate, cheese and all things pork. His culinary hero is Alton Brown.