Choosing an herb or herb palate for a dish is a lot like choosing a tie, an opportunity to give your look some nuance and personality. Think wearing a pastel tie to a spring wedding or deciding to top a roast chicken on buttery mashed potatoes with some freshly chopped chives.
It’s also an opportunity for failure: you shouldn’t put Italian basil on a taco just like you shouldn’t wear a striped tie with a striped shirt or a tie with little airplanes on it to the funeral of a guy who died in a skydiving accident.
Point is, choosing an herb palate is an important opportunity to complete the flavor profile of a dish. And while I’ll sometimes go without a necktie, I rarely exclude herbs in my cooking.
Since you choose the herb based on the dish and not vice versa, it pays to have options at hand. But this spontaneity presents a problem: Herbs are best in their fresh form and fresh herbs are perishable.
In these warmer months, instead of stocking your fridge with a variety of fresh herbs to use in a moment’s notice, stock them in your garden.
Growing Herbs
I use the word “garden” loosely—you don’t need gardening gloves and a floppy hat to be a gardener. All you need for an herb garden is six hours or more of direct sunlight.
My garden, according to my girlfriend, Lauren, is an “excessive” number of potted herbs that I “obsessively” arrange and rearrange in the yard. For renters like me, it’s hard to beat the affordability, durability and mobility of plastic pots.
If you have a big sunny spot for a garden bed and feel ambitious, ask a green-thumbed neighbor or an expert at a garden center or nursery about what soil to buy or how to condition the soil in your yard for gardening. Find someone who seems invested in your success.
Herbs need space. If you’re planting in a bed, give your herbs plenty of room to grow. If you’re unsure about the mature size of a plant, ask someone or look it up.
What to Grow
It might sound obvious but start by growing the herbs you anticipate using. If you don’t remember the last time you used thyme, go with rosemary. Contrarily, if you love thyme, growing more than one variety can be rewarding: I have found that lemon thyme excels in lighter applications with seafood, poultry and potatoes, where standard thyme remains my preference for rich sauces and stews.
Dr. Catherine Browne—owner of Ageless Herbs out of Hamptonville and a generous font of botanical knowledge, urges us to consider a plant’s nature in addition to its flavor when choosing between varieties. For example, Browne suggests growing Italian oregano over Greek, whose aggressive roots are more readily restricted by the pot resulting in a shorter and less productive plant than the Italian variety.
Some herbs—like dill and cilantro—simply won’t grow well in our hot climate.
If you love dill and want to keep it in your arsenal, it holds well in the fridge when wrapped in damp paper towels and stored in a Ziploc bag. Or, try using the juice from a pickle jar to add some fresh dill flavor in a pinch.
Unlike most other garden and herb stores, Archer Lodge Herb Farm owners John and Deva King don’t sell dill and cilantro. Their reason: “Once you remove integrity, you can sell people anything that there’s a market for,” says John. “I could sell you cilantro,” he continues, “but it won’t last very long.” Archer Lodge grows herbs in Clayton and sells them at Raleigh’s State Farmers Market.
Fortunately, not all is lost for cilantro lovers. Archer Lodge sells Vietnamese coriander, which, despite looking completely different from cilantro, tastes remarkably similar. I’m growing it for the second year in a row and I use it all the time in Latin and Asian cooking.
When shopping for herbs, I recommend starting with plants instead of seeds, and, generally speaking, the bigger the plant the better. If you buy a tiny plant and then use most of it, it will take 2 to 3 weeks for it to bounce back and become usable again. Larger plants have more to offer and recover more quickly.
Unless you want it murdering all of your other plants and taking over your yard, mint should be grown in its own container.
Tending your Garden
Go on social media and you’ll see cat parents, dog parents, actual baby parents, and, in this time of quarantine and crisis gardening, people like me—plant parents. Once you have chosen your herbs and potted or planted them in a spacious environment with plenty of sunlight, it’s easy to be a good plant dad (or mom).
Your first responsibility is to water them but pay attention; you can thoroughly water two similarly sized herbs in identical pots and the next day, one could be dry and one could be damp. Watering the plants usually doesn’t mean watering all the plants—only the ones that need it. Put your finger about an inch deep in the soil, and if it feels damp, leave it alone. If it’s dry, water it thoroughly—never partially water a plant, this encourages shallow root growth.
Next, you are responsible for weeding your pots and garden beds. Weeds compete with your plants for water and nutrients and should be plucked immediately.
Your last responsibility: use your herbs! Counter-intuitively, trimming your herbs habitually encourages them to grow more, so don’t feel like you’re using them up—they like it.
Not all herbs should be cut the same way, so look up each plant online. Parsley, for example, grows from the inside out like a fountain, so it’s best to harvest the outer stems. Basil can be clipped back about halfway down any stem, as long as you cut right above a leaf joint.
Always harvest with scissors. Pulling and tearing signals to the plant that it’s being eaten by insects, while clipping tells it to grow more.
Rules For Growing Herbs In Pots
1. Any type of pot will do as long as it has holes in the bottom for drainage. Keep in mind that clay pots are porous, so they dry out much faster than plastic.
2. With some exceptions, herbs grow rapidly, so they need at least a 12-inch pot. “Think about how miserable you’d be if your shoes were too small,” says Deva King of Archer Lodge Herb Farm. “You can’t expect your herbs to be happy in that situation either.”
3. Only use potting soil—do not put topsoil, garden soil, or yard dirt in your pots. Organic potting soils work great, as do most of the name brands. Do not use potting soil with “moisture control”—they will hold too much moisture and drown your plants.
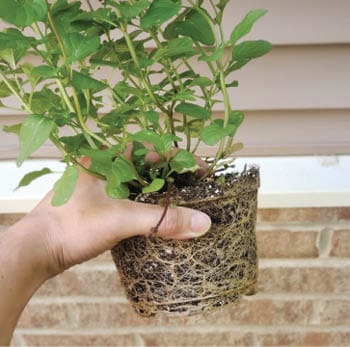
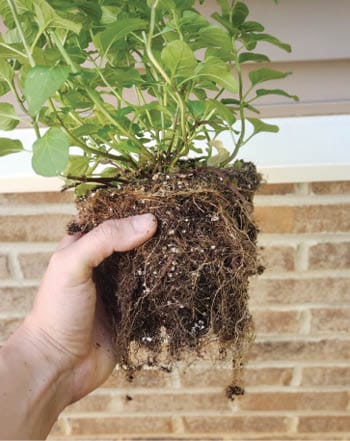
4. Loosen the ball of roots when re-potting a plant to encourage outward growth. (See photos above.)
5. Do not pack the soil into the pot—put it around the plant with your hand, then lightly tap the pot to settle the contents.
6. Water your plants immediately after potting them. This will help set the soil and gives immediate relief to the distressed roots.
Sachet
If you want flavor but don’t feel like tediously picking herbs like thyme, use butcher’s twine to tie the herbs in a little bundle. In restaurants we call this a sachet and it can be added early in the cooking process and removed whenever you’re satisfied with the imparted flavor.
Chiffonade (pronounced shiff-oh-nod) is a classic French cutting technique translating literally to “little ribbons” most commonly applied to basil. To do it, stack the leaves upside down on a cutting board, roll them up, and slice through very thinly with a sharp knife.
Chiffonade
In this series, local chef Bobby McFarland offers tips on how to cook like the pros. Currently the lead culinary consultant at The Kitchen Raleigh, McFarland loves eating pomegranate, cheese and all things pork. His culinary hero is Alton Brown.
I have long had a problem with what most of us consider “cooking.” It usually starts with a recipe, followed by a trip to the grocery store and then, after too much recipe reading and self-doubt, it ends with a dish that doesn’t look as good as what’s on Pinterest and a sink with an unnecessary number of soiled measuring cups.
With the exception of baking, which is more of an exact science, cooking at home doesn’t need to be so measured. Now more than ever, in this time of quarantine, cooking should be inspired by the ingredients you already have—not what you need to go out and buy.
Take, for instance, pasta, which I assume, based on the bare shelves at the grocery store, all of you have at home. If you have pasta on hand, you can chisel out a delicious and frugal meal from the contents of just about any kitchen.
Most published pasta recipes follow roughly the same procedure, so understanding pasta as a process rather than a specific recipe puts you in control of what goes in it. In my opinion, an excellent pasta entrée contains eight easy, customizable components.
8 Easy Components
1. Pasta If you want to eat a substantial amount of meat and veggies with pasta, reach for something bite-sized such as rigatoni or bow-ties (if you’re feeling fancy), or something wide with a lot of surface area like pappardelle or tagliatelle. The average serving of dry pasta per person is about one cup, depending on shape. To eyeball, consider that dry pasta almost doubles in volume when cooked.
2. Fat Fat absorbs flavor and spreads it across the palate. As long as you don’t grossly overuse it, fat gives sauce a velvety texture and a glossy finish. I start with roughly one tablespoon of fat per serving and I’ll usually stir in a knob of butter into the finished dish. Popular choices include olive oil, butter and my favorite—pork fat. If you have any cured pork—bacon, pancetta, salami—start your sauce by chopping it up and rendering the fat out over medium heat before sweating the aromatics.
3. Aromatics Carrot, celery, onion, jalapeño, bell pepper, fennel, garlic—one or more of these, when sweated in the hot cooking fat until soft (about five minutes), will add a great depth of flavor to the finished sauce. Just be sure to chop them fine. If you’re using garlic, add it last so it doesn’t burn.
4. Protein Unless it’s something like shrimp that cooks very quickly, your protein should be pre-cooked (leftovers work great) and chopped to about the same size as the noodles. If you’re using a long, wide noodle like pappardelle or tagliatelle, consider using ground or finely chopped meat for improved adhesion.
5. Vegetables Just like the protein, your vegetables should be cut appropriately for the shape and size of the pasta and fully or almost fully cooked before adding them to the sauce. Frozen vegetables are usually pre-cooked, so they can go right in—no thawing required.
6. Liquid The liquid you choose will constitute the bulk of your sauce, so this is a major flavor choice. I often choose more than one. Just remember—if you’re using something alcoholic like wine, add it first and reduce by half to ensure that the alcohol cooks out. Some options: wine, beer, chicken stock, vegetable broth, milk, cream, tomato sauce and canned diced tomatoes.
7. Herbs In my mind there are two categories of herbs: hard and soft. Hard herbs—rosemary, thyme, sage and oregano—should be added to the dish early on to cook out their raw, piney flavor. Since they are so hearty, hard herbs are decent in their dry form, although I still prefer fresh whenever possible. Soft herbs—the delicate, leafy ones like cilantro, parsley, basil, dill—are especially nice in pasta. They can be chopped and stirred into the sauce at the very end of cooking and/or sprinkled on as a garnish. Because they’re so delicate, I don’t like to use dried soft herbs. I love to grow herbs in the warmer months (stay tuned for next month’s column), but when I don’t, I keep a stash rolled up in damp paper towels in the fridge. While basil is the obvious choice for most pastas, penne with chorizo and Brussels sprouts in a dill cream sauce is nothing to turn up your nose at—so get creative.
8. Cheese Pre-grated parmesan is fine, just don’t buy the shelf-stable stuff in the tube. If you want to know why, read the ingredients. In my mind, cheese is mandatory. Stir it in at the very end to thicken the sauce and garnish with however much makes you happy. Pecorino is great in certain applications, but parmesan and grana padano (parmesan’s younger brother) are more versatile, so that’s what I keep around.
The Process of Pasta
First, choose your ingredients and have them all chopped up and ready to go. This fundamental virtue of preparedness is lovingly referred to as mise en place in professional kitchens, French for “everything in its place.”
Bring water up to a boil and add enough salt so you can taste it but not so much that it tastes like the ocean. Since dry pasta contains zero salt, it’s important to use this step as an opportunity to season the noodles. Add the pasta to the water and set a timer for 1-2 minutes less than the box recommends.
Heat the cooking fat in a medium-large skillet or sauté pan. Start gently sweating the aromatics with a pinch of salt over medium or medium-low heat until everything is soft (about 5-10 minutes). Be careful not to over-season at this point—you may be adding some salted pasta water to the dish later on.
Next, add garlic and hard herbs. If your sauce is going to be tomato based, this is a good time to add some tomato paste (which I find more convenient to buy in a tube instead of a can). Cook for another minute, until the garlic softens and your kitchen smells like Carmela Soprano’s.
Bump up the heat to medium-high and add protein and veggies to the pan. Cook, stirring regularly, until heated through.
Then—making sure wine and anything alcoholic are first—add your liquids. There should be enough liquid to fill the pan approximately a half inch deep. The noodles will absorb some of the sauce as they finish cooking, and there will be an opportunity for adjustments later.
When the pasta timer goes off, reserve a cup of pasta water and strain before adding the pasta to the sauce. Finish cooking the noodles in the sauce, adding back pasta water as necessary.
When the noodles are pleasantly al dente, stir in a knob of butter or a glug of extra virgin olive oil (a tablespoon or two per serving—feel free to eyeball it), 1-2 small handfuls of grated cheese and chopped soft herbs. Add salt if needed and crushed red chili pepper if desired. Top with more cheese and chopped soft herbs and serve.
In this series, local chef Bobby McFarland offers tips on how to cook like the pros. Currently the lead culinary consultant at The Kitchen Raleigh, McFarland loves eating pomegranate, cheese and all things pork. His culinary hero is Alton Brown.
When people think of French cuisine, they think of nice restaurants, impeccable service and high-end fare. When Indian food comes to mind, many of us think of a folded-up takeout menu with red cartoon chilies to indicate spiciness.
Chef Floyd Cardoz—an Indian-born, New York-based culinary icon—had a problem with how the Western world perceives Indian food; he also had the dream, talent and gumption to alter this perception.
In late March, the 59-year-old died tragically from coronavirus, but his life’s work remains intact: Cardoz’s vision lives on in the hearts and knife-wielding hands of his contemporaries and peers. His influence is so far-reaching, you can even experience it right here in the Triangle.
I was fortunate to befriend Cardoz following an introduction from a fellow culinary enthusiast. I had watched him winning “Top Chef Masters” and was eager to get into the kitchen with him. He graciously let me tag along as an extra set of hands at a charity dinner. Less than a year later, I became his line cook in Manhattan.
Chef Floyd was more than a great teacher. He taught his cooks to celebrate food at the intersection of culture, history, science and art. He taught us to be thoughtful—even under pressure—to honor our farmers by honoring our ingredients and to treat the dishwasher with the same respect as we’d treat the chef.
Cardoz asserted that Indian food is a powerful voice in global cuisine, the facets of which are infinitely applicable. Although he was classically trained in French cuisine, Cardoz became famous for applying his knowledge and passion for Indian food to the freshest local ingredients.
Raleigh’s own James Beard award-nominated chef, Cheetie Kumar, shares Cardoz’s penchant for celebrating local ingredients as well as his Indian roots. Although most local restaurant-goers consider Garland—Kumar’s outstanding downtown Raleigh restaurant—an Indian restaurant, Kumar defines it as “seasonal-Southern.” She utilizes flavors and techniques from India and Asia, and she likens the cornucopia of North Carolina agriculture to what her parents used to pick up at the markets in Punjab, but her work is entirely in the context of where she is.
Kumar recalls Cardoz’s influence on her from the inception of her cooking career.
“There was permission in [what Cardoz was able to accomplish],” she says. “Every time you see somebody echo something you’ve thought about, and you thought you were the only one thinking, it gives you a sense of confidence and affirmation.” Kumar paused. “It was the same feeling I would get if I saw a woman playing guitar on stage and slaying,” she continues. “I’d be like, ‘Yeah! We can do this!’”
Executive chef Jason Lawless of Durham’s Parizade spent his early career in Manhattan working under some of the country’s best chefs. Although he currently cooks Mediterranean food, the lessons he learned from Cardoz enrich his kitchen life daily.
“His influence is more than a certain dish,” Lawless says. “It’s technique and layering flavor, with sugar, acid and spices. I remember him telling me, something that makes a chef special is adding [hot] chili. Even if you don’t taste the chili, if it’s there, it will bring a dish to a higher level. Most chefs don’t realize that.”
Chef Floyd taught his cooks to use spice almost like salt—to enhance the flavor of the ingredients without overwhelming them. People already do this, to an extent, by adding salt and pepper to food. Chef Floyd encouraged us to refine this habit by diversifying the heat, using chili oils and finely minced fresh peppers instead of (or in addition to) black pepper. This philosophy, like many others he taught, extended far beyond Indian food into everyday cooking.
Cardoz was also a pioneer as an elite chef in the way he lived outside the kitchen.
Chef Eric Gabrynowicz, culinary vice president for the Tupelo Honey restaurant group, recalls his early years under Cardoz.
“Floyd would come into the restaurant early in the morning, work a lunch service, go to the gym for an hour, come back. He’d never throw it in anyone else’s face that he’s taking care of himself, but he was, and you always saw it. When you respect someone so much through food and through your passion and you see the other things they’re doing to keep their mental health and their family life intact—I didn’t realize until later how much that shaped me as a person. Floyd knew to never sacrifice any of the important things and he made sure we were all taken care of the same way.”
Floyd Cardoz is survived by his two sons, Peter and Justin, and his wife, Barkha—as well as by hundreds of people who were lucky to call him “chef” or “friend.” Cardoz also leaves behind a living mission to elevate Indian food to the stratospheres where it belongs and the dozens of beneficiaries of his mentorship who will pass on his uncompromising love of food—and life—to generations of cooks to come.
Never in history have people been so willing to overpay for a salad as they are today. Places like Happy + Hale, Cava and Chopt funnel hordes of yuppies and yogis alike through assembly lines of lettuce and accoutrements for upwards of 12 bucks a pop—and I have to admit—part of me gets it. They’re tasty, they’re filling, they’re low-carb, you eat them with one of those green compostable forks that resurrects a dead sea turtle every time you throw one out—they’re great. But, at $12 each visit, I just can’t justify the habit.
Do the math: One salad three days a week equals $144 per month. That’s not a salad budget, it’s internet plus utilities. Fortunately, with a little knowledge and effort, you can surprise yourself and your family with an endless variety of top-notch salads of your own creative inspiration.
A Template for Successful Salads
Most salads follow a simple formula: a bed of leafy greens or grains is topped or tossed with something creamy, something crunchy, something juicy, something sweet and/or savory, and a dynamic dressing that ties the flavor profile together. It’s easy to thoughtfully assemble a salad to fit this format. The dressing, however, requires a little more finesse and know-how.
The Case Against Store-Bought
You might be wondering: Why would I make my own salad dressing when the supermarket has everything I could possibly think of? It’s a fair question—I think the brand Ken’s alone makes 500 different types of Italian dressing. Making your own may seem like a fool’s errand: These companies specialize in salad dressing. Why would I compete with that?
Next time you’re in the salad dressing aisle, turn one of those bottles around. Most contain cheap ingredients like soybean oil and distilled vinegar, followed by a list of Walter White-level chemistry terms. Pretty ironic to dump that on top of a salad—the paradigm of health food.
Making your own salad dressing puts you in control of the ingredients. That means you can make Italian dressing out of Italian products—and skip the chemistry set.
Dress for the Salad You Want
Classically, a vinaigrette is made of one part vinegar to two or three parts oil, depending on the vinegar’s intensity. Considering vinegar is 95 percent water and the fact that oil prefers to float on water than mix into it, this formula proves problematic.
Contrary to popular belief, oil—not vinegar—wilts greens to create soggy salads. A two-ingredient salad dressing separates quickly, causing the vinegar to drip to the bottom of the bowl while the oil wreaks havoc on the leaves. Fortunately, there are ways to delay oil and vinegar’s separation for long enough to eat the salad—or even indefinitely.
When I make a salad dressing, I usually mix vinegar with a few emulsifiers before gradually whisking in oil. Emulsifiers—or surfactants—are molecules that are both hydrophilic and lipophilic, meaning they attract both water and fat, and therefore aid in the seemingly impossible task of stabilizing a mixture of oil and vinegar.
There are a handful of common culinary products that are rich in emulsifiers, and I recommend relying on them heavily. Emulsifying a dressing improves its texture—making it feel creamy, rather than wet or oily.
Building a Vinaigrette
I usually make vinaigrettes in a small mixing bowl on top of a wet paper towel so it doesn’t slide around during whisking.
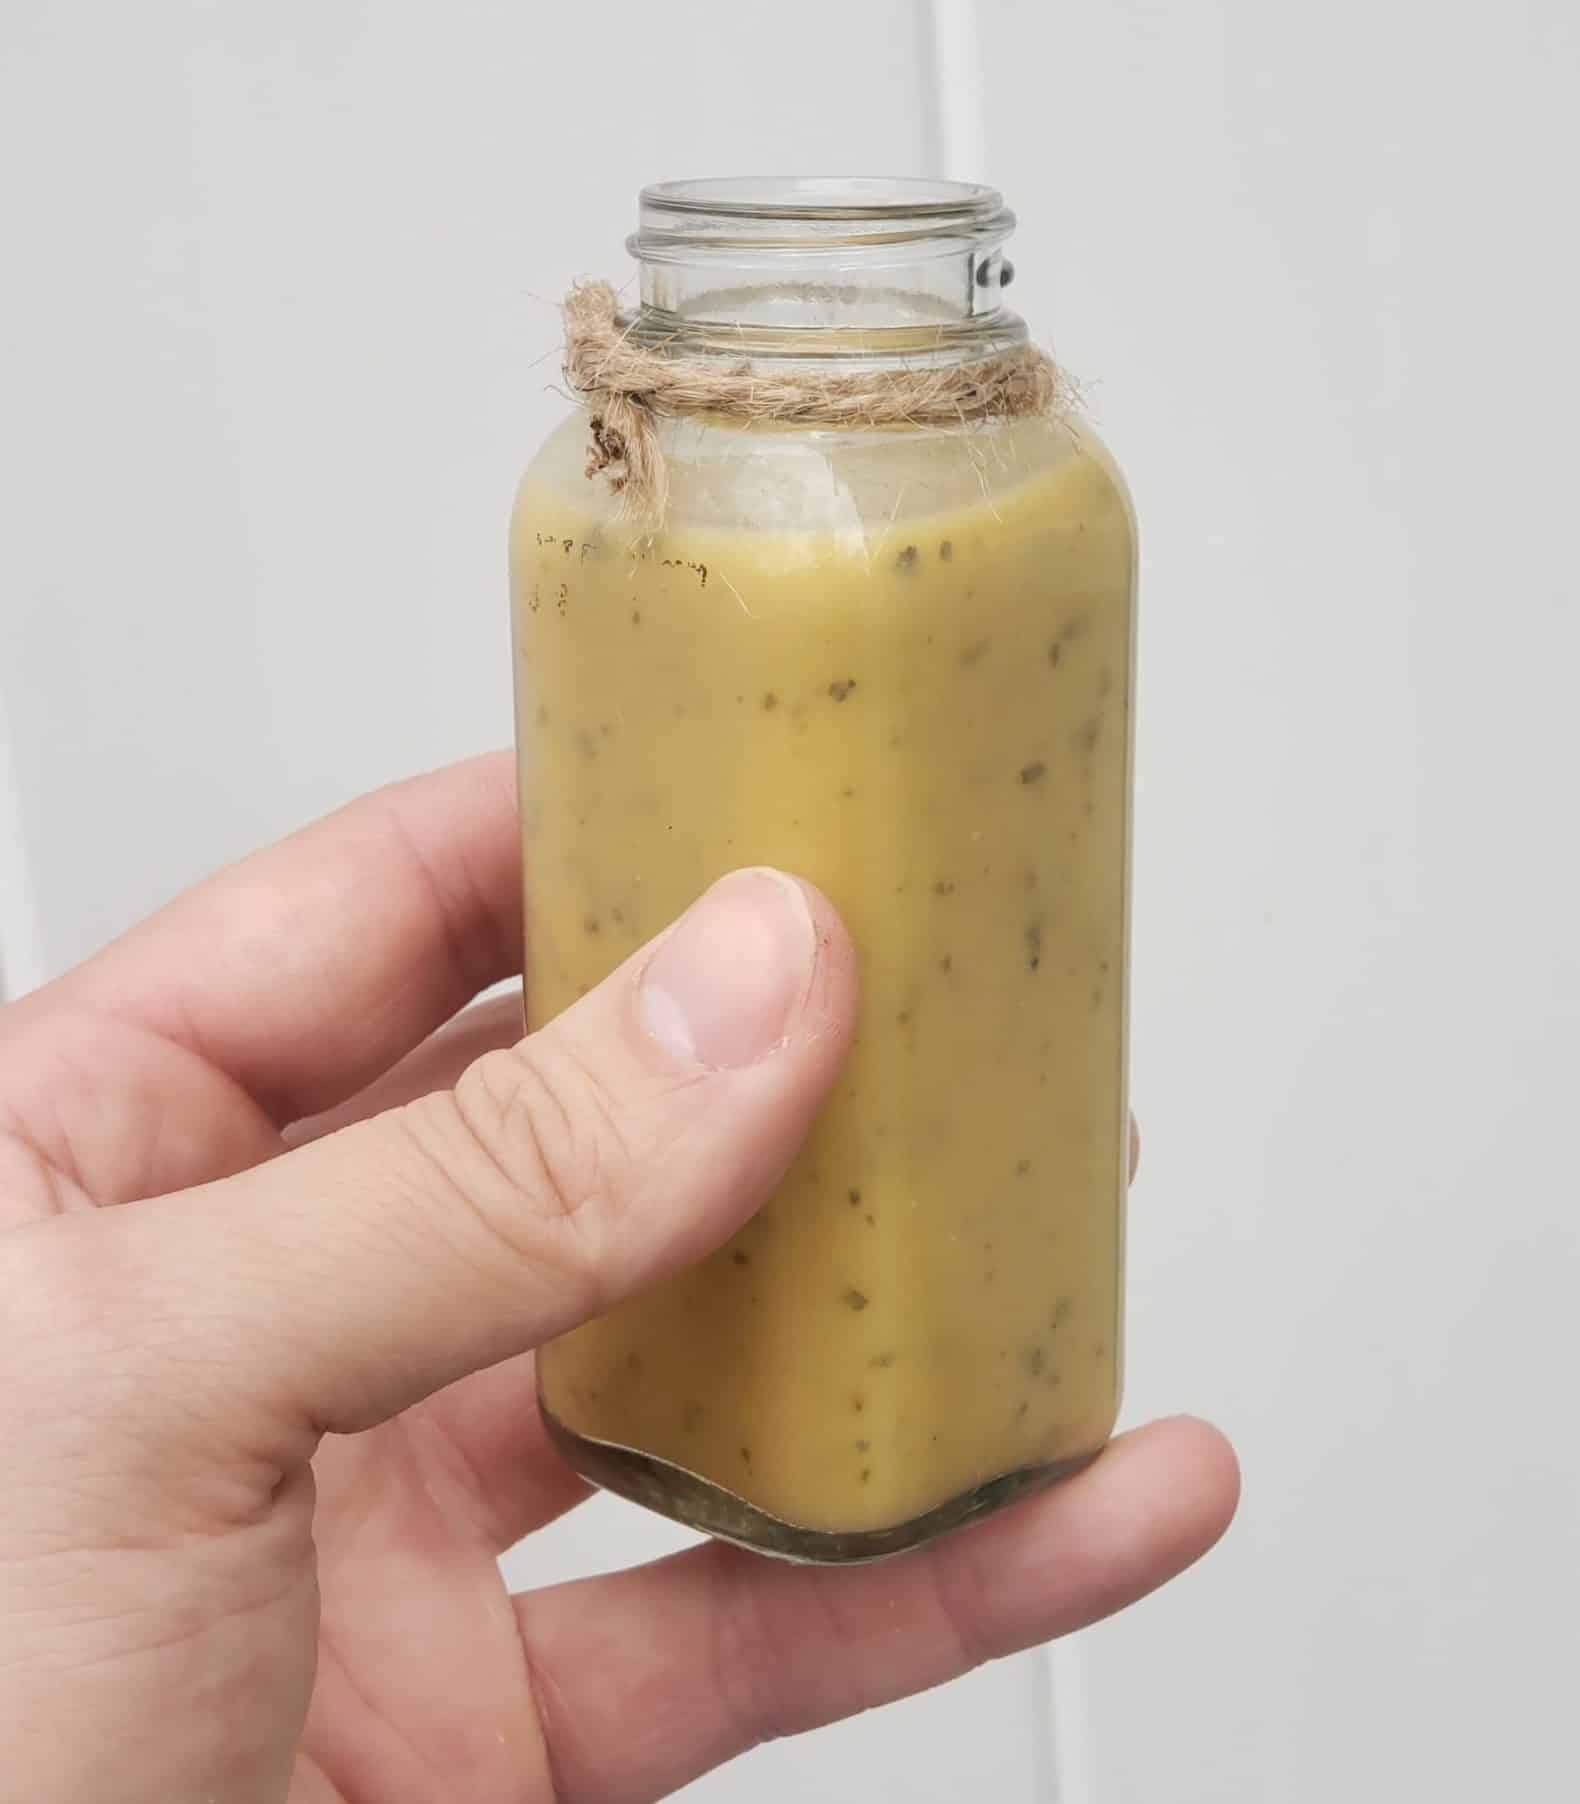
Start with vinegar: The amount of vinegar you start with will be about a quarter of the total dressing you’ll produce, depending on how much flavoring, emulsifiers and oil you use. I usually happen to make extra—which is okay, since dressings generally improve after a day or two of flavor-melding in the fridge. Do yourself a favor and save old pickle jars or buy some plastic squeeze bottles to house your arsenal of homemade dressings.
Balance your flavor base: After you select your vinegar (or vinegars), choose add-ins that build on the desired flavor profile—mustard, honey, hot sauce, etc. Generally speaking, I try to include something sweet, something spicy, some chopped up herb, and 99 percent of the time—garlic.
If you can, use emulsifiers or other viscous ingredients. It ultimately helps form the emulsion if your flavor base (before adding oil) has the texture of a thin paste that can coat the back of a spoon. If your base is too thin but you like its flavor, add a squeeze of mayo—which has a relatively neutral flavor—to up the consistency.
Whisk in oil: While whisking vigorously, gradually drizzle in oil, cutting the flow occasionally to make sure it’s all getting absorbed before continuing to add more. I usually use extra virgin olive oil, unless I am going for an Asian flavor profile. Simply stop when you like the texture and flavor.
Seasoning: When adding salt to your dressing, you may want to add a little more than you think. You’re not just seasoning the dressing—you’re seasoning all the ingredients in the salad.
Pantry Staple Italian Dressing
This recipe is composed of ingredients that most people already have on hand, making it a great go-to utility dressing that is both simple and impressive.
Yield: about 1 cup of dressing
Ingredients: ¼ cup red wine vinegar (50 grams) 1 tbsp dijon mustard (17 grams) 1 tbsp honey (17 grams) 1 tbsp Duke’s Mayo (14 grams) 2 tsp Texas Pete (or your favorite hot sauce) (10 grams) ½ tsp Worcestershire sauce (2.5 grams) 1 big clove of garlic, crushed and minced into a paste (9 grams) 1 tsp Italian seasoning or ½ tsp each dry oregano and basil ½ cup extra virgin olive oil (100 grams) 2 tsp kosher salt (about 8 grams), plus more in the salad to taste Pepper to taste
Process:
Place a small mixing bowl on a damp paper towel to prevent sliding.
Whisk together all ingredients except the oil until homogenous.
While whisking vigorously, slowly drizzle in the oil. If the oil starts pooling, stop pouring, whisk harder, and make sure everything’s integrated before resuming.
If desired, add more salt and pepper to taste.
In this series, local chef Bobby McFarland offers tips on how to cook like the pros. Currently the lead culinary consultant at The Kitchen Raleigh, McFarland loves eating pomegranate, cheese and all things pork. His culinary hero is Alton Brown.
I’m 28 years old, which means most of my friends are getting their own places and making adult decisions. I also cook for a living, which means my friends’ adult decisions often include asking me what kind of knives they should buy.
For many, knife shopping is surprisingly intimidating. Sets range from unsettlingly cheap to unattainably expensive and knife jargon can be elusive.
Forged or stamped blades? What kind of material? What the hell is a bolster? Should I just buy Cutco knives from my neighbor’s son and call it a day?
These are all valid inquiries—except for the last one. Cutco knives only seem sharp because, on a microscopic level, they’re serrated like bread knives. But due to shoddy materials and poor craftsmanship, they deteriorate quickly. Within months, Cutco buyers are left with a set of knives that cut like spoons and an un-communicated (yet palpable) resentment towards the neighbor’s son who supplied them.
It’s not just Cutco—I dislike knife sets as a concept. Picture all the knives in your knife block. Now, picture the knives you use regularly. You probably chose a traditional chef’s knife, possibly a santoku (a chef’s knife of Japanese design) and a serrated bread knife.
So why pay for a set of knives if you only really need two or three?
My advice: don’t spend a small fortune on a set. Instead, hand-pick the knives you’ll actually use. Buying knives individually allows you to curate a set tailored to your own preferences. Once a chef’s knife is chosen, the rest of your set will fall into place.
Photo by Lydia Santogade, Food Seen
Buying a Chef’s Knife
The salespeople at Williams-Sonoma will tell you that pricier knives with forged blades—those that undergo complex processes to replicate old-school blacksmithing—are universally better than their stamped counterparts, which are punched out of a sheet of metal, like a cookie cutter, then sharpened to finish.
While there’s value in the beauty and craftsmanship of a forged knife, technology has come a long way in bringing the performance of affordable stamped knives up to par. Truth is, you can get a good knife at any budget—just do your homework. Read reviews and look for words like high carbon that indicate the hardness of the steel (the harder the better). Also, never buy a knife with a full bolster, which is a thick junction between the handle and the blade that extends down to the heel. This makes the heel impossible to sharpen and renders the knife useless over time. I like a half bolster.
Finally, buy a knife that sparks joy. A knife you love is a knife you’ll use and take care of, and that’s what really matters.
Owning a Chef’s Knife
You can’t judge a book by its cover, but you can judge a cook by his knife—and how he keeps it. Here’s how to start.
1. Holding your knife
If you didn’t know that there’s a correct way to hold a knife, you probably hold your knife wrong. To hold it correctly, put your middle finger under the bolster and loosely pinch the top of the blade between your thumb and your index finger. The pinch grip provides unparalleled control. It may seem awkward at first, but soon, the knife will feel like a natural extension of your hand.
2. Using your knife
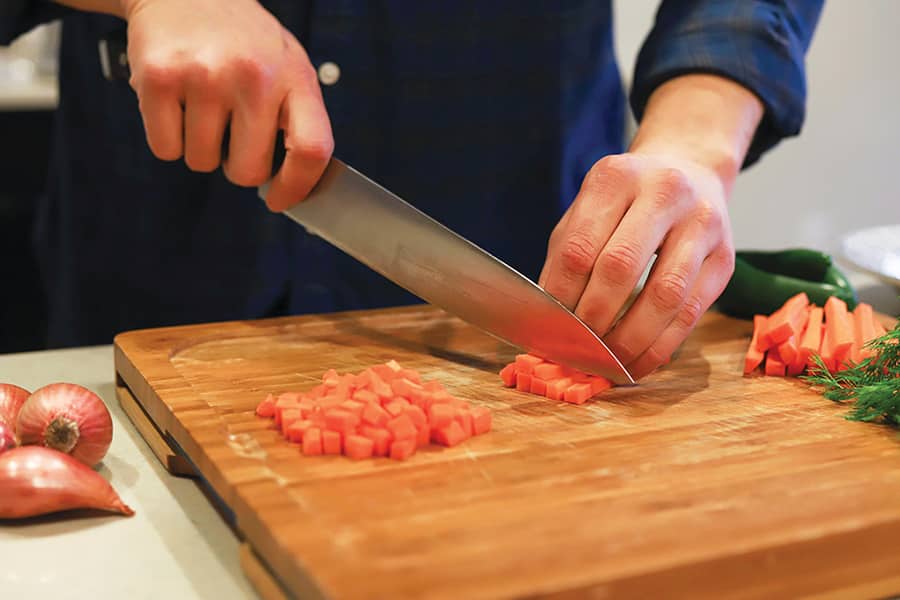
Your non-knife-wielding hand should employ the claw technique to hold the food and feed it to the knife. So long as your fingertips are bent back behind your knuckles, your knife is safe to work right up against your hand. This means more cutting and fewer trips to the ER.
As you tackle new recipes, challenge yourself to learn basic cutting skills on Google and YouTube. Recipe calls for diced onion? There’s a method for that. If you keep researching and practicing, you’ll be surprised by how quickly you build your repertoire. It’s not a lot of work for stark, lasting improvements.
3. Cleaning and storing
Never—I repeat—never put your knife in the dishwasher. When you’re finished using it, gently wipe your knife clean with a wet towel or sponge, dry immediately and put it away. Store the knife in anything that’s made to store knives—do not let it lie unprotected in a drawer.
4. Honing and sharpening
If you watch cooking shows, you’ve likely seen chefs swiping their knives down a metal rod that’s misleadingly sold in knife sets as a “sharpening steel.” On a microscopic level, the edge of a sharp knife gets bent through regular use. When the edge bends, the knife feels dull—no matter how sharp it is. Honing the knife on a steel restores the edge and makes the knife feel sharp again. Chefs’ techniques on the honing steel vary, so look it up and choose a method that feels safe and effective to you.
Over months of regular use, knives lose their edges completely and become dull. Because of the extra force required to use them, dull knives are actually more dangerous than sharp ones, so when the cutting gets tough, Google “how” or “where to sharpen knives” and get it done.
5. Enjoy the process
Cooking is impossible to master—even the best chefs are still figuring it out—so just respect the fundamentals, be creative and have fun.
In this new series, local chef Bobby McFarland offers tips on how to cook like the pros. Currently the lead culinary consultant at The Kitchen Raleigh, McFarland loves eating pomegranate, cheese and all things pork. His culinary hero is Alton Brown.